Creating JSF Application by using Eclipse , Maven and Tomcat

Any tools etc we will see how you can write JSF code directly using the support on the Eclipse IDE without installing it.
First,go to this link and download the Eclipse application
We will choose this option after you turn on the installer. After click installation button, the installation process will start

We need a server to run the JSF code. Apache Tomcat, a lightweight and fast server software, is sufficient for this.
Install Tomcat
If Apache Tomcat is not installed on your Eclipse IDE, follow these steps.
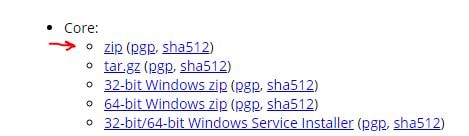
- First go to tomcat site
- Click on the latest release

- Then download it by clicking on the zip file
After the download is finished, we click on the new dynamic project as below

Enter to new project name
- Let’s choose Tomcat installed from the target runtime.
- I will select Dynamic Web Module Version 3.0.
- In the Configuration section, select the JavaServerFaces v2.2 Project.
- Click on the Next button.
After modifying in configuration, extract the zip we downloaded and set the path as that folder.

Let’s go to the next screen by saying “Next”. On the next screen, click Generate web.xml deployment descriptor, and click Next.
On the screen now, Eclipse wants us to implement one JSF. We’ll get this down, too. Click the Download Library button on the screen.

Eclipse will search in the relevant repository and open up a screen where we will present a JSF implementation. In the screen that appears, select JSF 2.2 (Mojorra 2.2.0) and say Next.
Now click on the Finish button and tick the I accept the terms of this license. Mojorra will be downloaded for us and added to the Eclipse repository, and the screen will open when we click on the previous library download button.

If you have received a zip file is empty error, apply the solution from this link

Now right click on the opened project, select HTML File from the New section.

Change the name of the file to index.xhtml and click on the Next button.
Now we will select an HTML Template on the screen that opens. The Java Server Faces framework is a framework built on Facelet. Let’s choose the top New Facelet Composition Page from this screen and click on the Finish button.

Now let’s add HelloClass.java file under Java Resources -> src and update the code like this.
|
2 3 4 5 6 7 8 9 10 11 12 13 14 15 16 17 |
package helloproject; import java.io.Serializable; import javax.faces.bean.ManagedBean; import javax.faces.bean.SessionScoped; @SuppressWarnings("serial") @ManagedBean @SessionScoped public class HelloClass implements Serializable{ String message = "Hello Java Server Faces On Eclipse IDE!"; public String getMessage() { return message; } } |
Let’s update our index.xhtml code as follows:
|
2 3 4 5 6 7 8 9 10 11 12 13 14 15 16 |
<!DOCTYPE html PUBLIC "-//W3C//DTD XHTML 1.0 Transitional//EN" "http://www.w3.org/TR/xhtml1/DTD/xhtml1-transitional.dtd"> <html xmlns="http://www.w3.org/1999/xhtml" xmlns:ui="http://xmlns.jcp.org/jsf/facelets" xmlns:h="http://xmlns.jcp.org/jsf/html" xmlns:f="http://xmlns.jcp.org/jsf/core"> <h:head> <title>JSF On Eclipse</title> </h:head> <h:body> <h:form> <h:outputText value="#{helloClass.message}"></h:outputText> </h:form> </h:body> </html> |
When we write the Eclipse IDE # {} bookmark and put it in brackets and make it crtl + space, it makes us a managed bean proposal. When we select the name of the managed bean and put the dot operator and ctrl + space again, it also lists the fields in the managed bean.
Now let’s right click on my project and run As -> Run On Server and run the project on the server.
Demo

Convert to Maven Project
Project right click -> Configure -> Convert to Maven Project and click to finish button.
plugin tag dependencies in pom.xml
|
2 3 4 5 6 7 8 9 10 11 12 13 14 15 16 17 18 19 20 21 22 23 24 25 26 27 28 29 30 31 |
<project xmlns="http://maven.apache.org/POM/4.0.0" xmlns:xsi="http://www.w3.org/2001/XMLSchema-instance" xsi:schemaLocation="http://maven.apache.org/POM/4.0.0 http://maven.apache.org/xsd/maven-4.0.0.xsd"> <modelVersion>4.0.0</modelVersion> <groupId>helloproject</groupId> <artifactId>helloproject</artifactId> <version>0.0.1-SNAPSHOT</version> <packaging>war</packaging> <build> <sourceDirectory>src</sourceDirectory> <plugins> <plugin> <dependencies> </dependencies> <artifactId>maven-compiler-plugin</artifactId> <version>3.7.0</version> <configuration> <source>1.6</source> <target>1.6</target> </configuration> </plugin> <plugin> <artifactId>maven-war-plugin</artifactId> <version>3.2.1</version> <configuration> <warSourceDirectory>WebContent</warSourceDirectory> </configuration> </plugin> </plugins> </build> </project> |
if you have question do not forget to write from the chat button next to it or from the comment


I as well conceive hence, perfectly indited post! .
wonderful post, very informative. I wonder why the other specialists of this sector don’t notice this. You should continue your writing. I am sure, you’ve a huge readers’ base already!
thank you.Everything is for you..
Had some trouble creating a JSF Project but this finally worked 🙂 Thx!